Management
The Members Management functionality allows you to invite new members to your account, assign specific permissions through ACL Groups, and manage access rights efficiently. This page is divided into two main sections: Members and ACL Groups, each serving distinct purposes in user and permissions management.
Using the Members Management page, you can maintain a secure, organised and scalable system for managing user access and permissions.
How to Use the Members Tab
1. Members Sub-tab
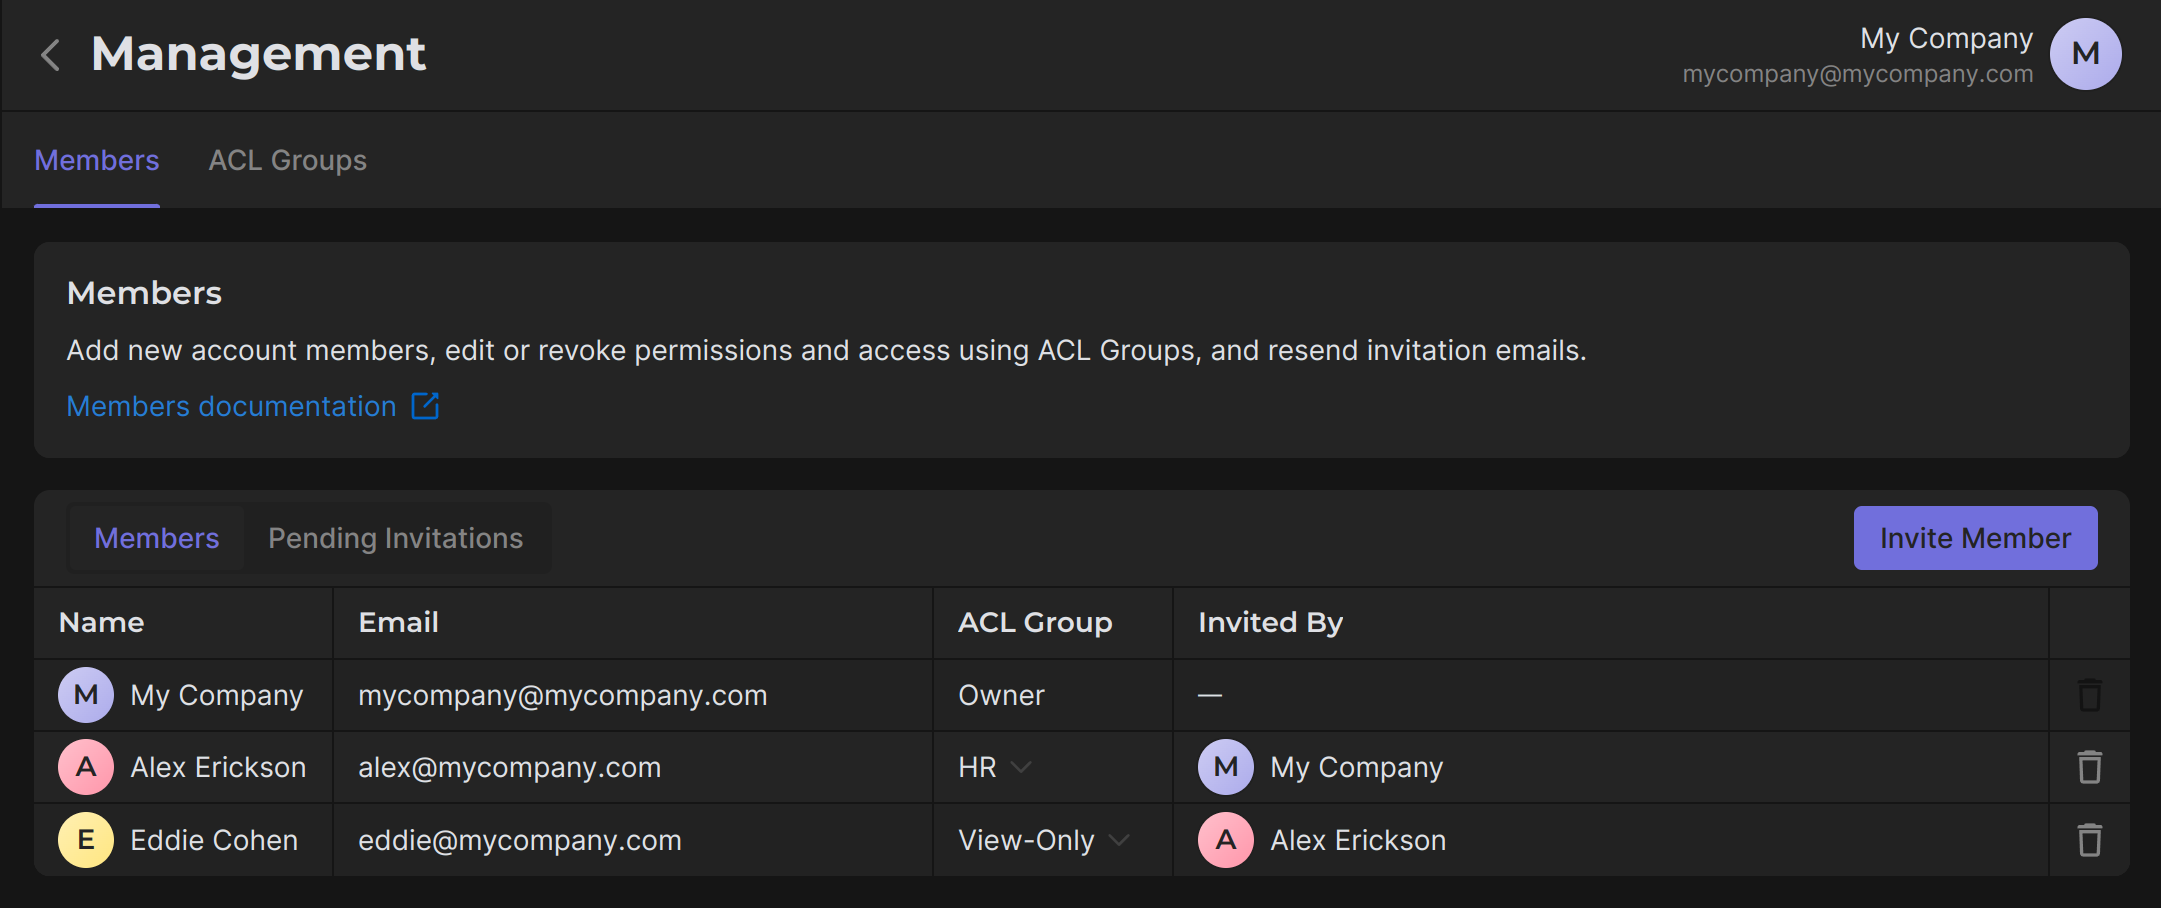
The Members sub-tab provides a complete list of all current account members and their associated details.
Key Features:
- View member details, including name, email, ACL Group, and the person who invited them.
- Manage members by editing or deleting their access.
- Quickly invite new members.
Steps to Invite a New Member:
1. Click the Invite Member button.
2. Enter the member's email address.
3. Select an ACL Group from the dropdown menu (if no ACL Groups are available, create one first in the ACL Groups tab).
4. Click Send Invite to email the member a unique invitation link.
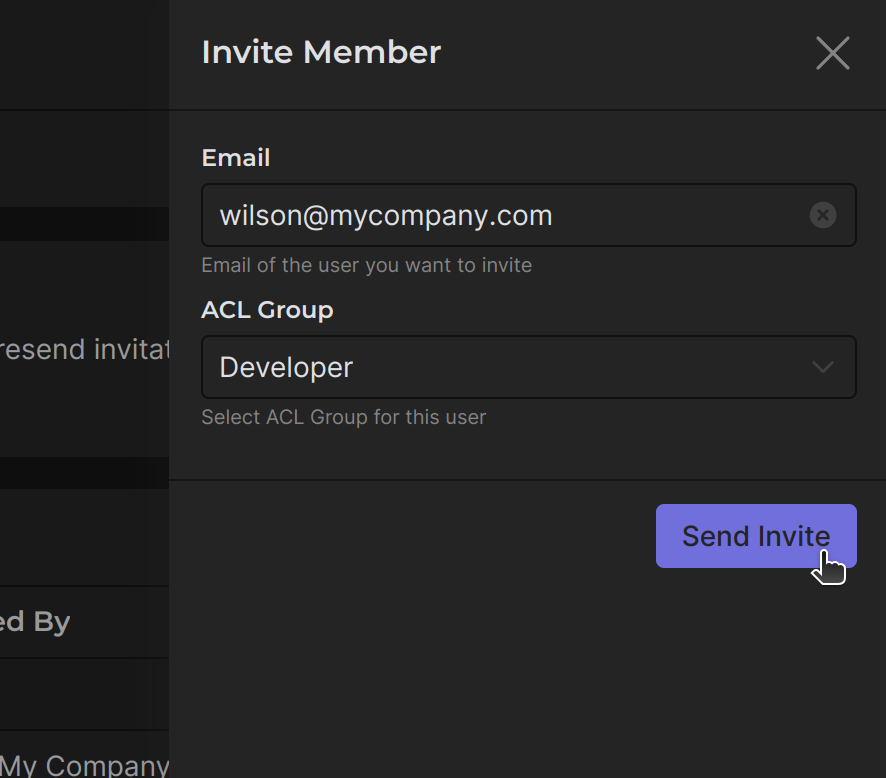
Once accepted, the member will inherit the permissions defined by the selected ACL Group.
2. Pending Invitations Sub-tab
The Pending Invitations sub-tab displays details about invitations sent to prospective members who have not yet joined.
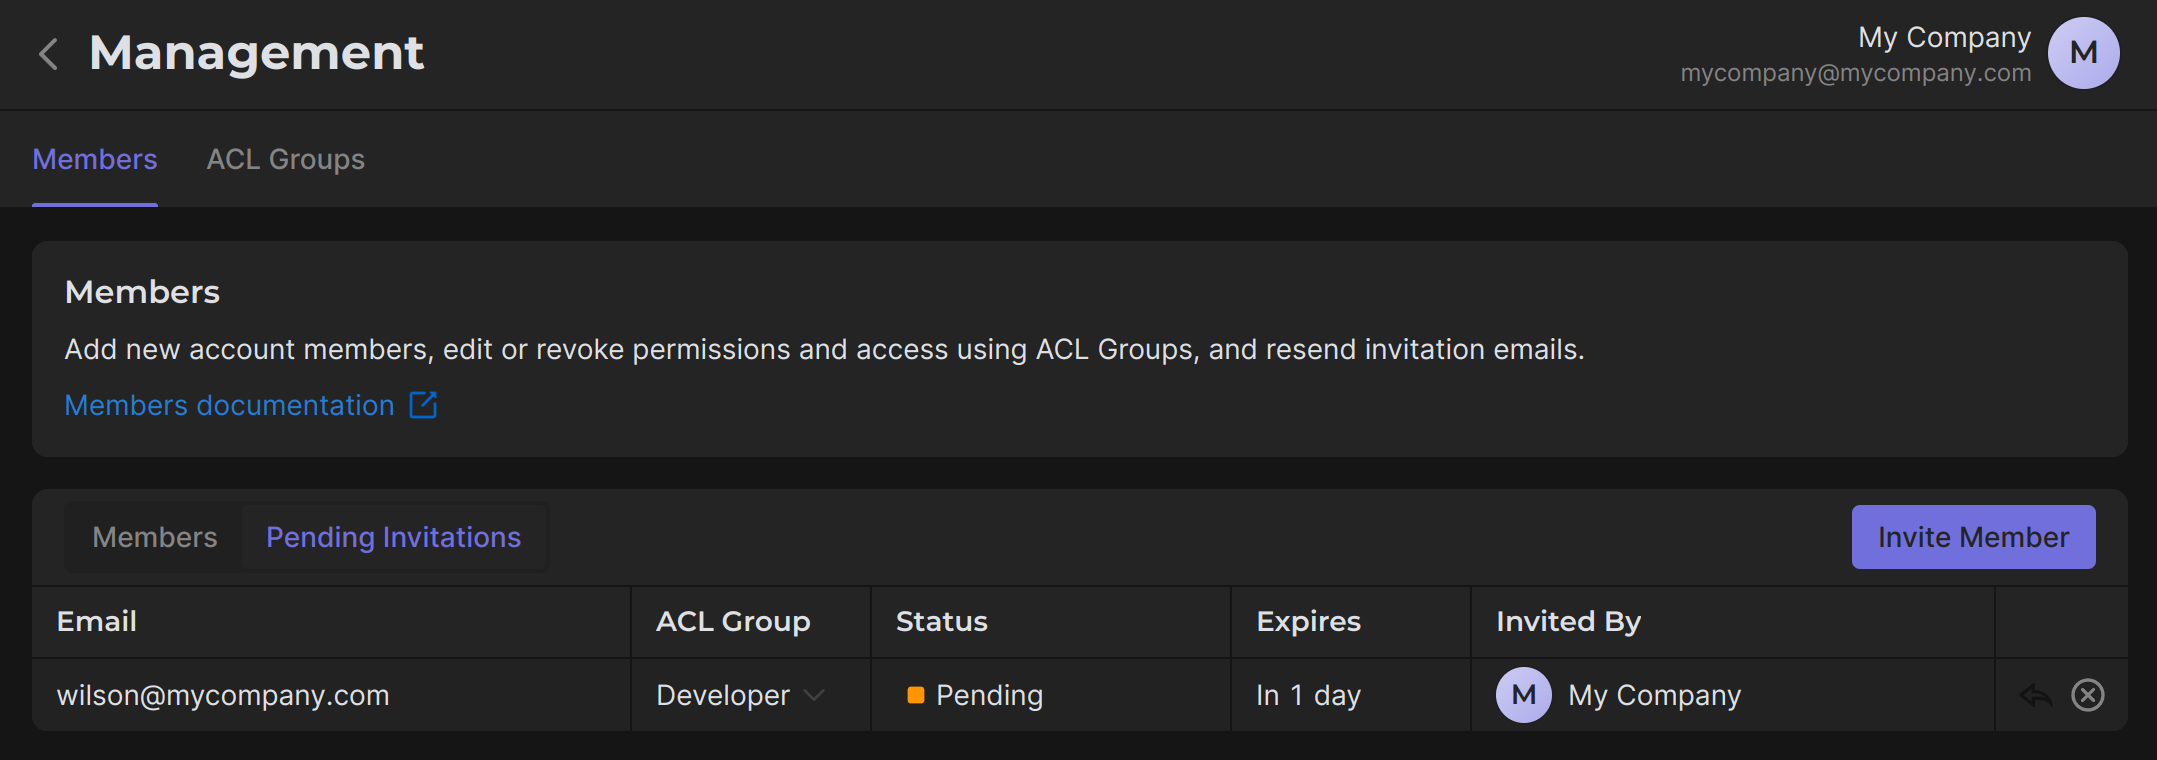
- Monitor invitation statuses, including pending and expired invitations.
- View details such as the email address, assigned ACL Group, invitation status, expiration date, and the person who sent the invite.
- Resend invitation emails as needed.
Use Case:
Keep track of unaccepted invitations so that you can issue re-invitations in a timely manner, avoiding delays in accepting new participants.
How to Use the ACL Groups Tab
Purpose of ACL Groups
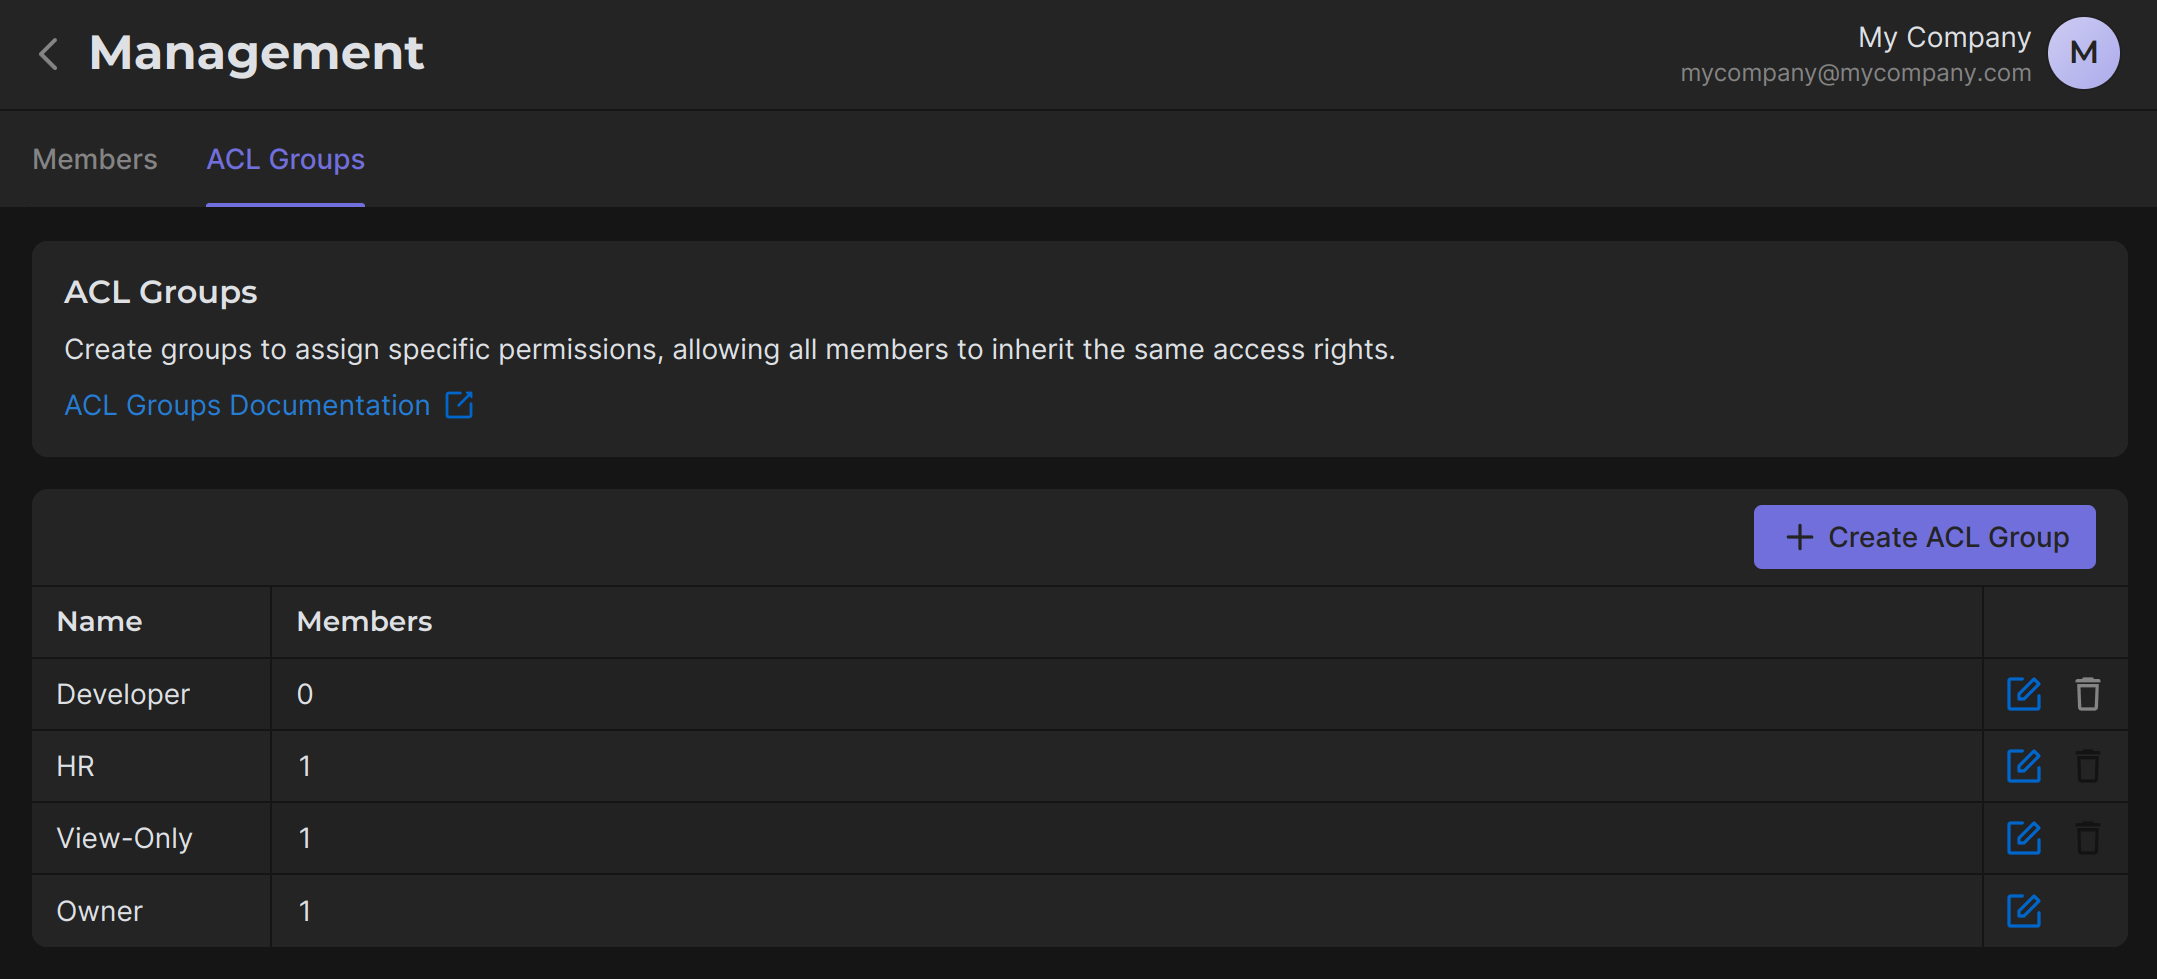
The ACL Groups section enables you to create and manage access control groups. These groups define specific permissions that members inherit, ensuring consistent access rights and simplifying the management of user permissions.
Key Features:
- Create Groups: Assign permissions to roles and apply them to multiple members at once.
- Granular Permission Control: Define what members can view or do across the system, providing a highly customizable permission system.
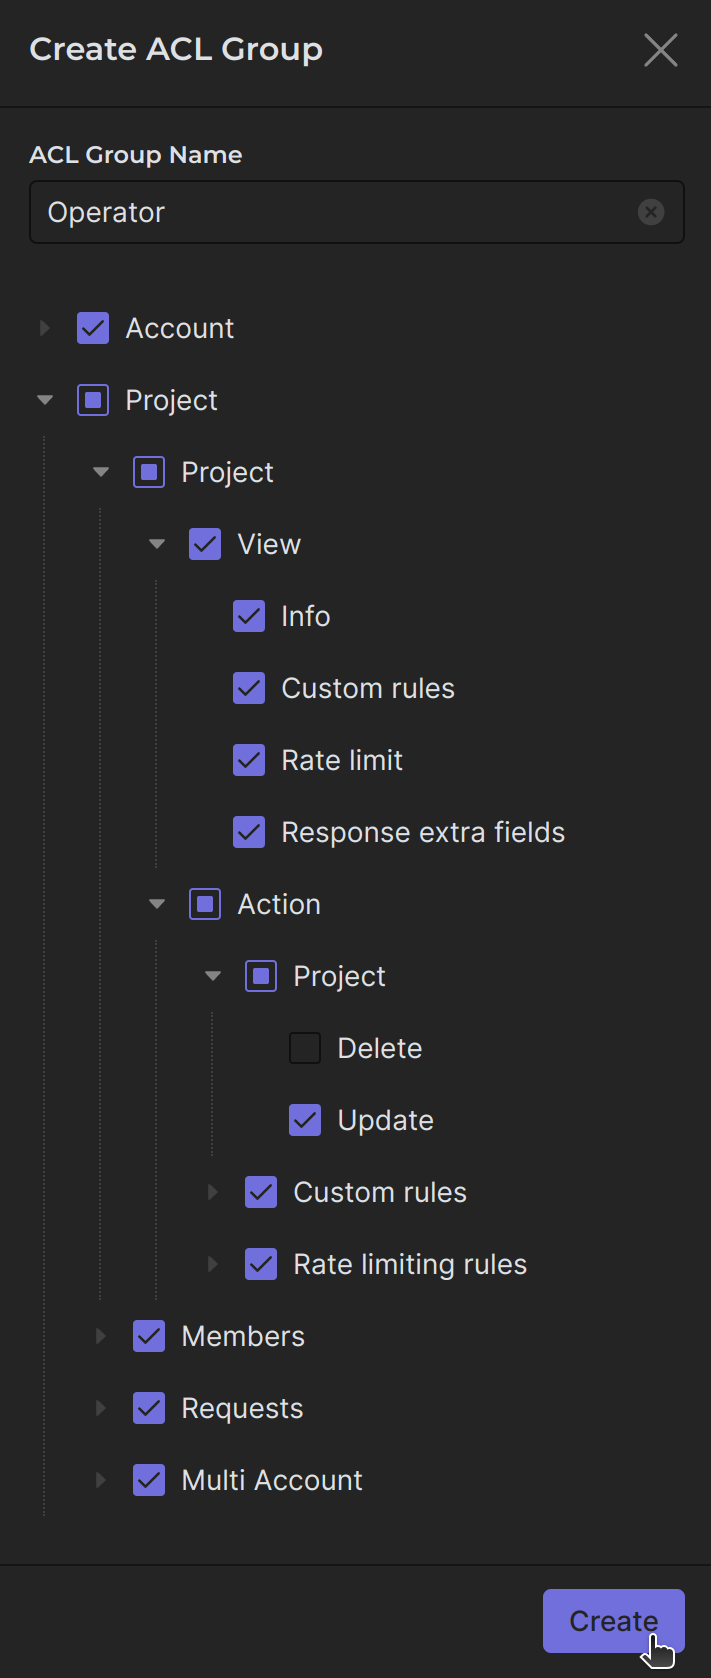
Steps to Create and Configure an ACL Group
1. Click Create ACL Group button.
2. Provide an ACL Group Name (e.g., "Operator" or "View-Only").
3. Configure Permissions by selecting what the group members can do:
- View: Allows members to see specific sections or data.
- Action: Grants members the ability to make changes or take actions in those sections.
Use Case:
- Create an ACL Group for "Operators" with permissions to view and edit projects but limit their access to deleting new projects.
- Use a "View-Only" group for external parties or your employees who only need access to reports without modifying data.